Showing posts with label Before and After. Show all posts

Thursday, July 2, 2009

One of MANY Projects!

I am doing about 10 different projects right now ~ all having to do with what I need to start showing again this Fall.

Since I will be showing sidesaddle, I am trying to gear everything toward the era of the late 1800's. This is my antique Steamer Trunk...

..that I am going to refurbish hopefully to look like this!

This is a solid brass lid lift I am going to attach on the front of the trunk.

These is the hardware that keeps the leather handles on.

..and these are the new handles I ordered.The total + shipping was about $38.00. I need to buy some copper colored paint for the tin. I have the black paint already. It should be a fairly simple project and add some character to my stall decorations at the show.

Wednesday, June 10, 2009

New Door and Stall Handles

Ever since we installed these handles in the barn..I have hated them. Yes - they were functional, but they rusted and well, they totally lacked the character that the rest of the barn possessed!

When I was in Oklahoma City covering a horse show a few months ago, I found these. I still need to touch up some stain and paint where needed, but ...

..Wow - what a difference! They are heavy and made of forged steel. They feel good in my hand when I have to pull the heavy stall doors.

I LOVE these! Now for the best part...I found them at a Home decor outlet for $4.00 each!

Monday, January 19, 2009

Barn Lighting Renovations

These were our old barn lights. I HATED them! Sometimes they worked, sometimes not. They looked - well, just awful!

A long time ago I saw a picture of a barn up North. It was a very exquisite barn that was as elegant as it was functional and it had big iron light fixtures. Ever since then, I have wanted to do that in our barn.

...and today was the day. Here are our new barn lights!

Day or night, light or dark, every single time I go into the barn, I have to turn on the lights..just because I want to!..and for the horse savey - the barn ceiling is 12 feet tall. I only cross tie my horses either in their stall or in the wash stall. Both have rubber floor mats to prevent slipping.

Tuesday, August 12, 2008

The Newest Building Project..

Do you remember this gazebo? I built it last spring. I love the way the ceiling of it mimics the rays of the sun...

..but it felt too open. I also wanted it to do more than just stand there and look pretty...so I went out and bought several of these..

...and this...

..and went to work. I love to build things...and the bigger the better!

One thing I wanted was an eating bar. This was tricky too. You see, we get a lot of rain and many products - even those made for outdoors can warp ..like a very beautiful and expensive mosaic table top I made :0( This is a standard Formica counter top. Not too expensive and easy to work with. I only had to seal the back and sides to make it water tight...and it has already gone through the weather test with Hurricane Edouard.

Sunday night was the first time we were able to use it. The stools were given to me by my Father. I have 5 of them. They used to reside in my parents home, but since Dad does not entertain, he gave them to me. Thanks Daddy!

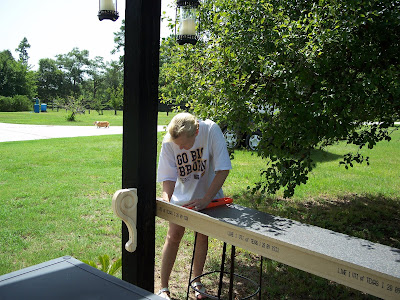
Also needed was some counter space. We Bar-B-Que out here at least once a week and we had no place to put utensils and supplies. This 2x12 painted black with the fancy shelf holders worked out just fine.

I purchased this plastic cabnet for a bit of extra storage..for now. I have a feeling that it will be replaced with something a bit more permanent later.

Still looking too open - I know I am not done, but it certainly it more functional! If you have any ideas about what else would look and function well in this gazebo - please chime in.As for the cost:
Formica Counter Top - $96.00 at Lowes..Home Depot had the exact same one for $149!
Shelf Holders - $9.00 each
Table Legs - $13.95 each
Spray sealant for counter top edges - $5.50
Other items I already had - scrap wood for support and black oil based paint that we use for the horse fencing.

Wednesday, November 21, 2007

The Emergency Buffet!

For those of you who have read my blog from the beginning know that my husband and I are separated and we are working very hard to restore our relationship. We are still separated though...but I am trying to spend more and more time at the farm...our home. Many of my things are still in storage and I gave my piano to my Father. I had a large empty wall and a big need for more counter space - especially for Thanksgiving if it was to be held inside. Having little time to find something - I still think I did rather well. I found this 1940's buffet for the bargain price of $225.00. Picture #1 is a bit deceptive and does not show it's real condition though. I painted it black to match the French Country decor of the home and I am very pleased with it!


Taa Daa! The finished product!!

Saturday, July 28, 2007

Before and After Shower Curtain


Before - You can see how I lowered the curtian and tried to use ribbon to fill in the empty space.


After photos show the add on black silk panel(no more machine washing!)and coordinating ribbon

As some of you know, I had a problem with a decorative shower curtian that I made for our home. After I washed it, it shrunk no less than 8 inches!

My inspiration for this project came from Rhoda's blog. Her Mother made her beautiful curtains that happened to be in the same toile fabric as my shower curtain and looked so elegant with a top panel that I could not wait to redo mine. Thank you again Rhoda!

Friday, July 27, 2007

Before and After Cabana


Before

After!
Just trying to organize a few things together and just because I love seeing the before and afters of every project!

Friday, July 20, 2007

Before and After


When I moved out, I feared that many of the things I cherished about our farm would go to the wayside, simply because they were my projects and with a limited amount of time, my husband would not be able to care for them. I was right and one such victim was my flower garden that extended all the way down the walkway from the drive to the stairway that led to our home. As I have begun to spend more time at Equus Villa, I made the decision to restore this area. Here are the before and after photos. Please keep in mind that with the torrential rains we have had for the past 60 days, even the blooming flowers are damaged...but a slight improvement to say the least!